Kadiska APIs Principles & Setup
Kadiska provides a configuration API as well as a query API. These APIs are compatible with OpenAPI version 3.0.
The associated OpenAPI JSON files can be found at the following locations:
The detailed documentation (schemas, definitions, ...) is available:
From there, you can also test API queries. The results can be exported in JSON format.
The endpoints used for the configuration API are /api/v1/config/*.
Depending on the action, supported methods are GET, POST, PUT, DELETE and PATCH.
The available endpoints and related HTTP methods for the query API are the following:
| HTTP method | Endpoint |
|---|---|
| POST | /api/v1/query/ |
| POST | /api/v1/query/traceroute |
| GET | /api/v1/query/definitions |
API calls authentication
All API calls must be authenticated through the use of a JSON Web Token (JWT). In order to create a JWT, you first need to create an "API client ID" and "API client secret" pair. According to your role (owner, data analyst or provisioner), these credentials will let you create a JWT that will in turn allow you to use the configuration API and/or the query API.
So your API journey starts with the creation of your API client credentials.
Client secret management
Creating an API client
The creation of API client credentials is done through the Kadiska platform.
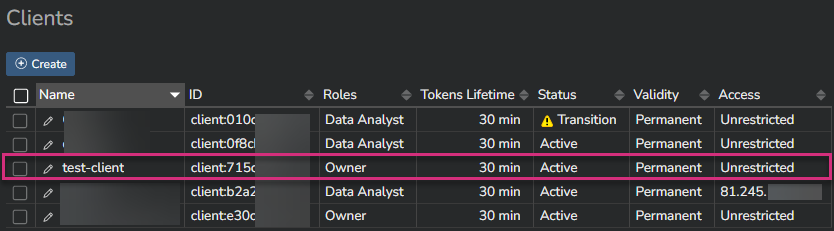
Navigate to the configuration main menu and select "API Clients":
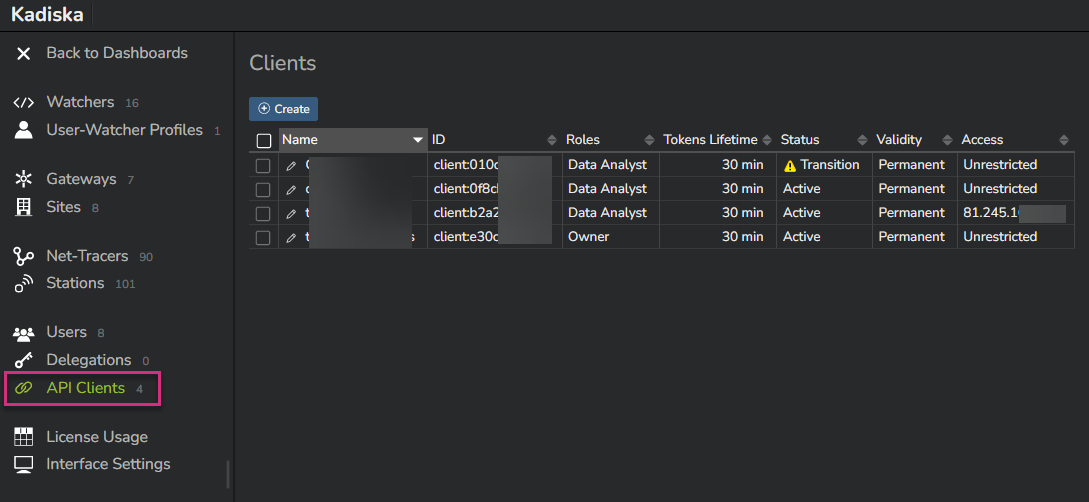
The screenshot above shows existing API client credentials and their corresponding status and parameters:
| Column name | Description |
|---|---|
| Name | User friendly name of the API client configuration |
| ID | API client ID |
| Roles | The API client has a role that aligns with the users role. The level of access to the APIs is created accordingly. Please refer to this section for more information |
| Tokens Lifetime | Validity period of the JWT created by this API client - must be between 5 minutes and 24 hours - default value is 30 minutes |
| Status | Status of the API client secret - Can be either "Active" or "Transition" (see next section for more information) |
| Validity | Validity period of the API client itself - is "Permanent" by default unless specified otherwise during the configuration process |
| Access | Provides the list of IP addresses from which API calls can be issued - is "Unrestricted" by default unless specified otherwise during the configuration process |
To create a new API client, click on "Create":
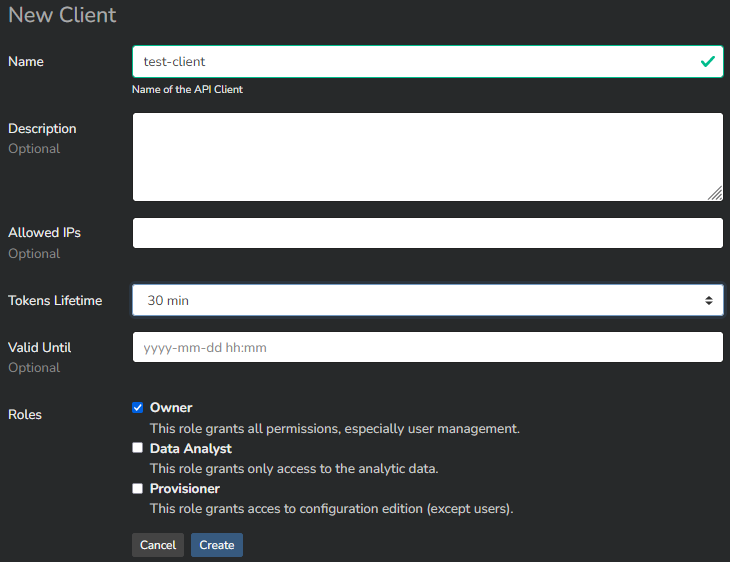
"Allowed IPs" corresponds to the IP address or list of IP addresses (multiple IP addresses are separated by commas) from which you can issue API calls. This field is optional. If you leave this field empty, there will be no restriction applied.
"Tokens Lifetime" corresponds to the lifetime of the JWT used in each API call. The default value is 30 minutes. The duration can be configured between 5 minutes and 24 hours.
The field "Valid Until" lets you specify the validity period of the API client configuration itself, that is the combination of the API client ID and API client secret. This field is also optional. If you leave it empty, the API client is permanent. Fill in this field if you want to automatically deactivate this API client at a specific date and time. The format must be "yyyy-mm-dd hh:mm".
Once you are done with the configuration, click on "Create" to confirm.
Your API client credentials appear on the screen:
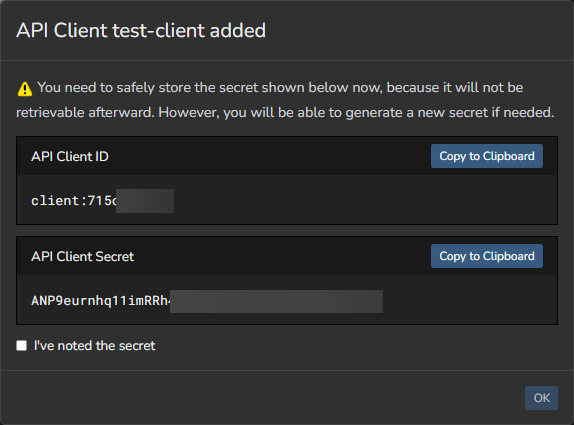
Your API client ID will be visible in the list of available API clients (see main "API Clients" menu). The API client secret on the other hand will ONLY be visible during this creation process.
Make sure you safely store the API client secret as you will not be able to recover it later!
You must acknowledge you have copied your credentials in a safe location by checking "I've noted the secret" before going forward. Once this is done, click on "OK".
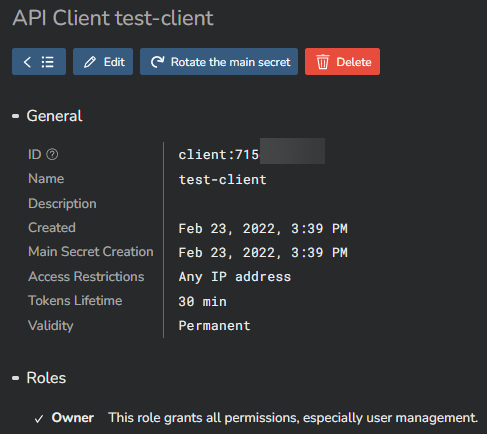
Your API client configuration is now visible on the main list of available API clients.
You are all set. You can now use these credentials to create a JWT and use Kadiska APIs.
Rotating the main secret
In certain circumstances, like a suspicion of security violation, you may want to create a new API client secret while keeping your API client ID. Even under normal circumstances, this is always a good practice to periodically renew your credentials.
You can do it by rotating your API client secret.
From the list of available API clients, click on the API client you want to create a new Client secret for. Then click on "Rotate the main secret" :
Click on "Rotate" to confirm.
You get a new API client secret:
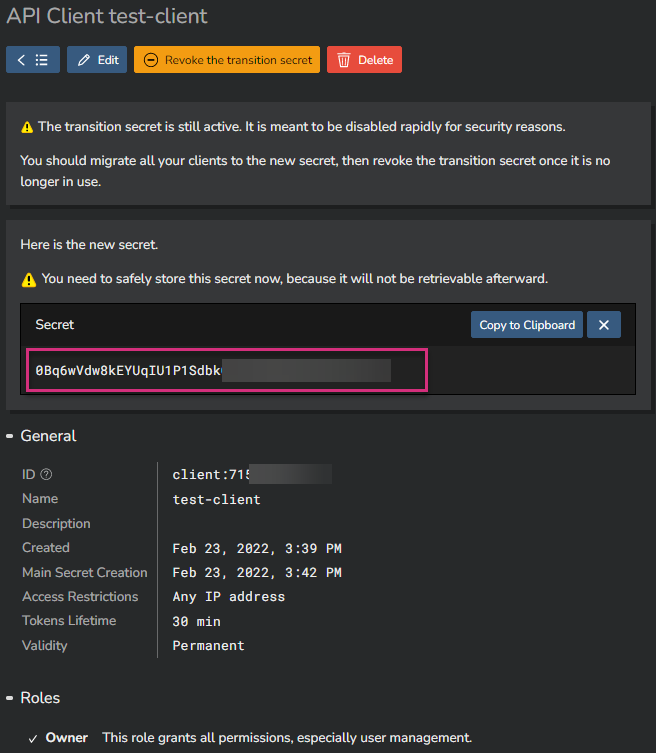
The status of your API client secret has switched to "Transition":
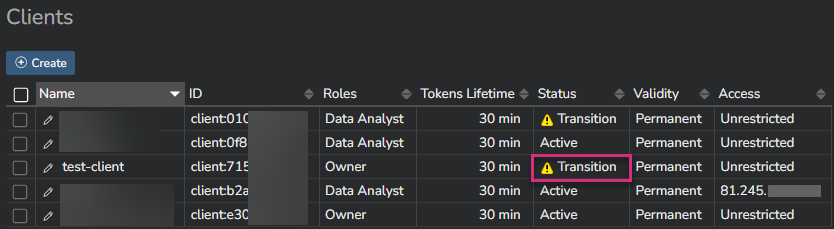
This status means that the previous API client secret can still be used. It allows you to migrate all systems that use the API at your own pace. Once you are sure all systems only use the newly created API client secret, then you can revoke the old one.
Revoking the transition secret
Revoking the transition secret is a straightforward process.
Select your API client configuration from the list of available API clients, then click on "Revoke the transition secret" and confirm by clicking on "Revoke":
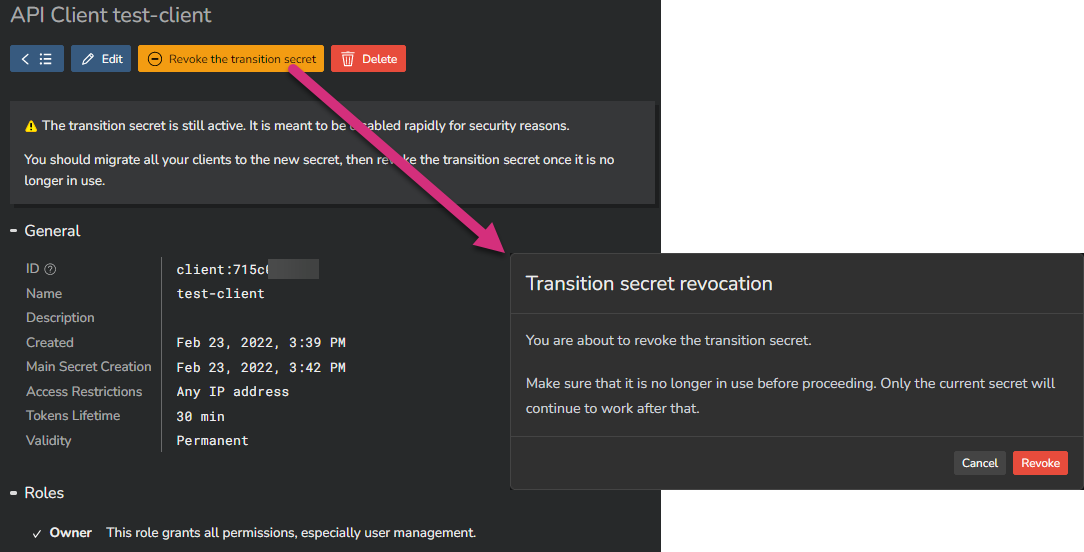
Once this is done, only the new client secret can be used.
Creating a JWT
Now that you have created your API client credentials, you can use your favorite tools to launch API calls or use your favorite language to create scripts.
The first operation consists of creating the JWT.
The configuration API endpoint to use is /api/v1/config/clients/{id}/tokens, where {id} is your API client ID (format to use = "client:YOUR CLIENT ID"). The method is POST. The data is your client secret:
This JWT will be valid for the duration that you configured during the API client credentials setup.
As an example, this is what a JWT creation Python script looks like:
import requests

client_id = "client:715c010eff"
client_secret = "JnQJVqFu_9G34Dy2qabUrkVPuWw4I7Os91AW12xl3B0"

url = f"https://app.kadiska.com/api/v1/config/clients/{client_id}/tokens"

resp = requests.post(url, json={"secret": client_secret})
resp.raise_for_status()

jwt = resp.json()["token"]
print(jwt)