How to set up a Net-Tracer
Requirements
In order to guarantee proper Net-Tracer operations, the required network flows depend on the configured method (see here for more details). The following picture and associated tables provide the details of these flows.
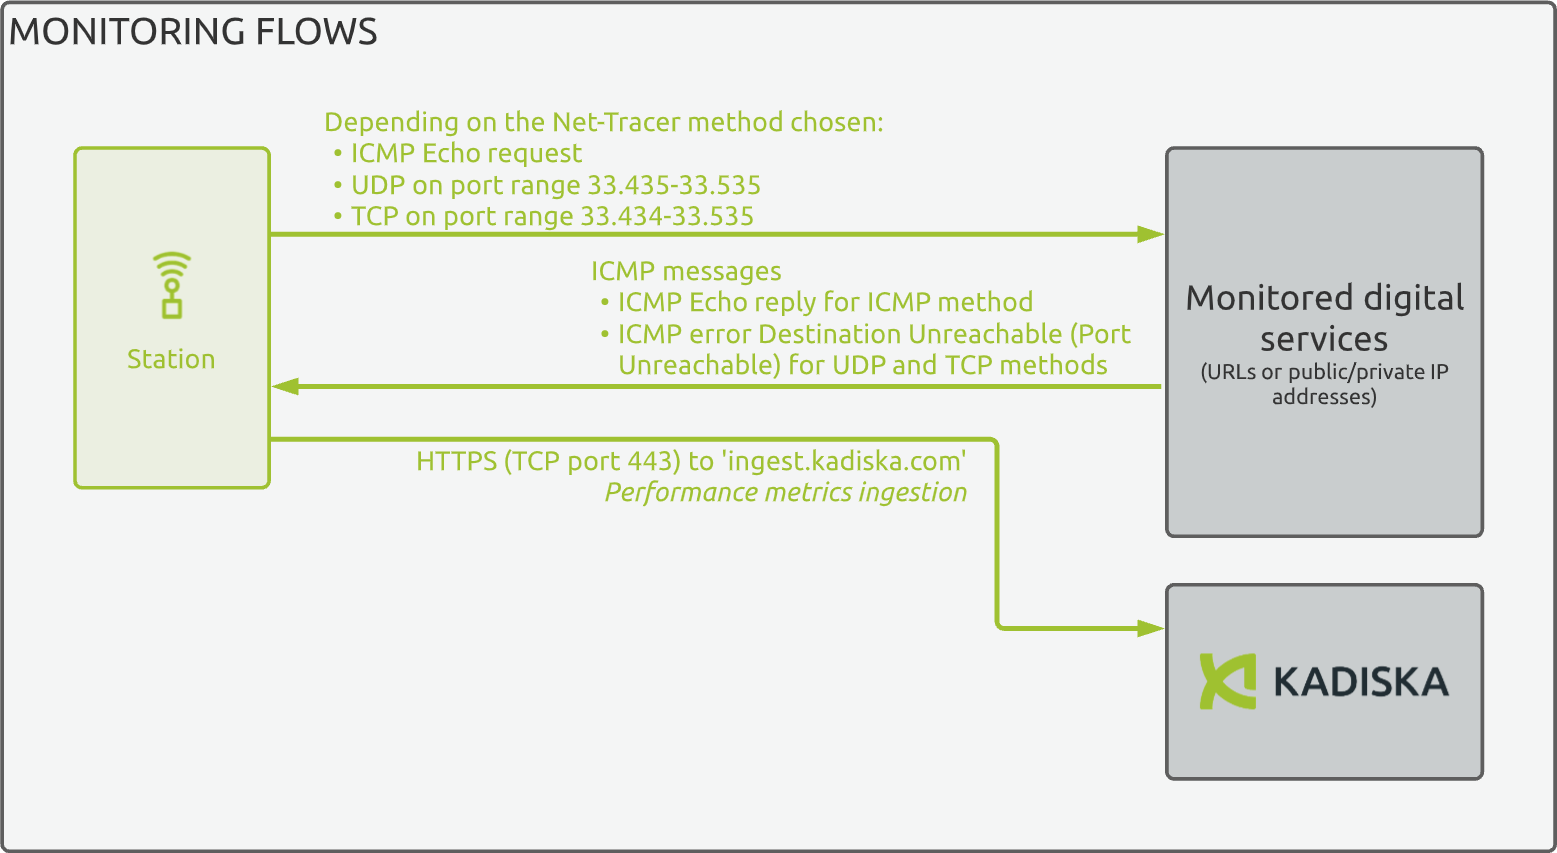
For ICMP method:
| Source | Destination | IP protocol | Type | Code | Comment |
|---|---|---|---|---|---|
Tester host IP |
all Tracer target IPs |
ICMP | 8 | 0 | Echo Request |
any |
Tester host IP |
ICMP | 11 | 0 | Time To Live Exceeded in Transit |
all Tracer target IPs |
Tester host IP |
ICMP | 0 | 0 | Echo Reply |
For UDP/TCP methods:
| Source | Destination | IP protocol | Ports |
|---|---|---|---|
Tester host IP |
all Tracer target IPs |
TCP/UDP | 33.434-33.535 |
| Source | Destination | IP protocol | Type | Code | Comment |
|---|---|---|---|---|---|
all Tracer target IPs |
Tester host IP |
ICMP | 3 | 3 | Destination Unreachable - Port Unreachable |
any |
Tester host IP |
ICMP | 11 | 0 | Time To Live Exceeded in Transit |
For TCP/ACK method:
| Source | Destination | IP protocol | Ports |
|---|---|---|---|
Tester host IP |
all Tracer target IPs |
TCP | 33.434-33.535 |
| Source | Destination | IP protocol | Type | Code | Comment |
|---|---|---|---|---|---|
any |
Tester host IP |
ICMP | 11 | 0 | Time To Live Exceeded in Transit |
| Source | Destination | IP protocol | Comment |
|---|---|---|---|
all Tracer target IPs |
Tester host IP |
TCP | TCP RST |
| Method | Ingress flows | Egress flows |
|---|---|---|
| ICMP | allow ICMP Echo Request | allow ICMP Echo Reply |
| UDP | not listen to 33.435 - 33.535 UDP ports range | allow ICMP Destination Unreachable (port unreachable) |
| TCP | not listen to 33.435 - 33.535 TCP ports range | allow ICMP Destination Unreachable (port unreachable) |
If you use FQDN (Fully Qualified Domain Name) as Net-Tracer target, the Kadiska Tester should also have a DNS server present in its TCP/IP stack configuration.
Step 1: Net-Tracer creation
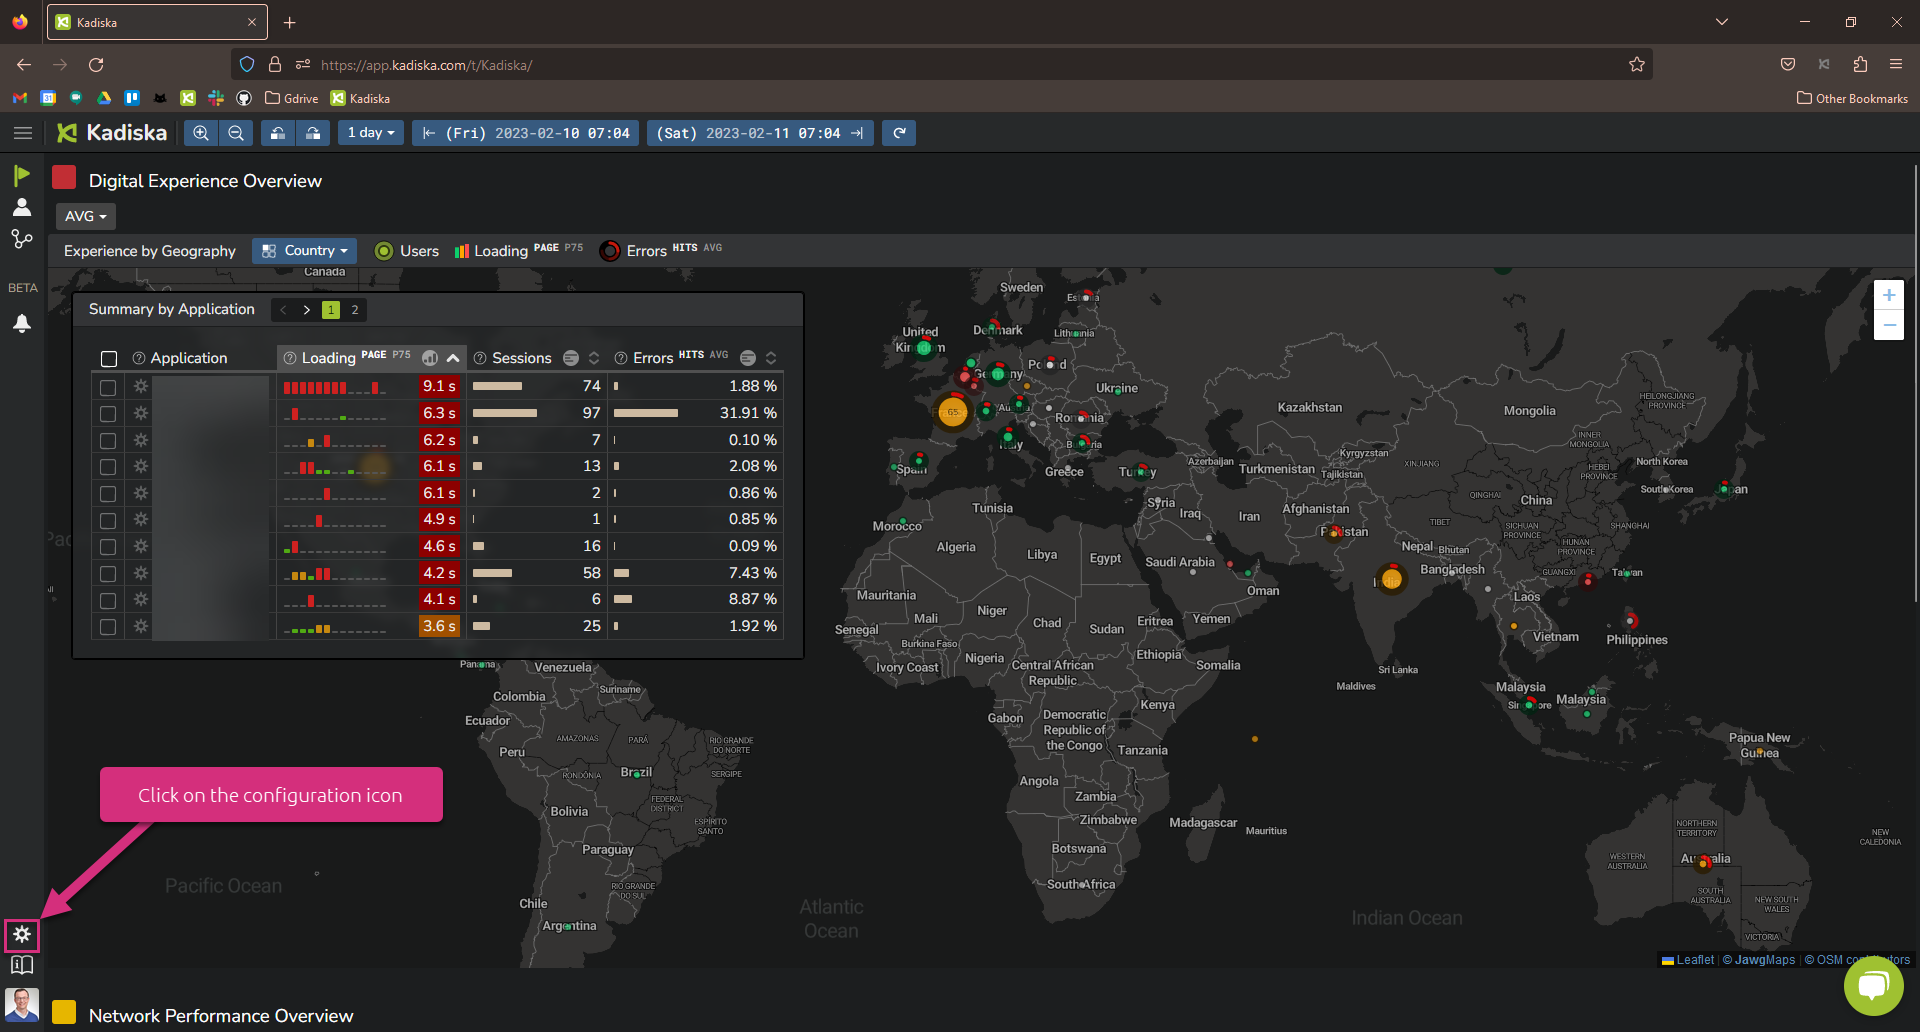
First, login to the Kadiska platform and click on the “Configuration” icon:
Click on the Net-Tracers menu:
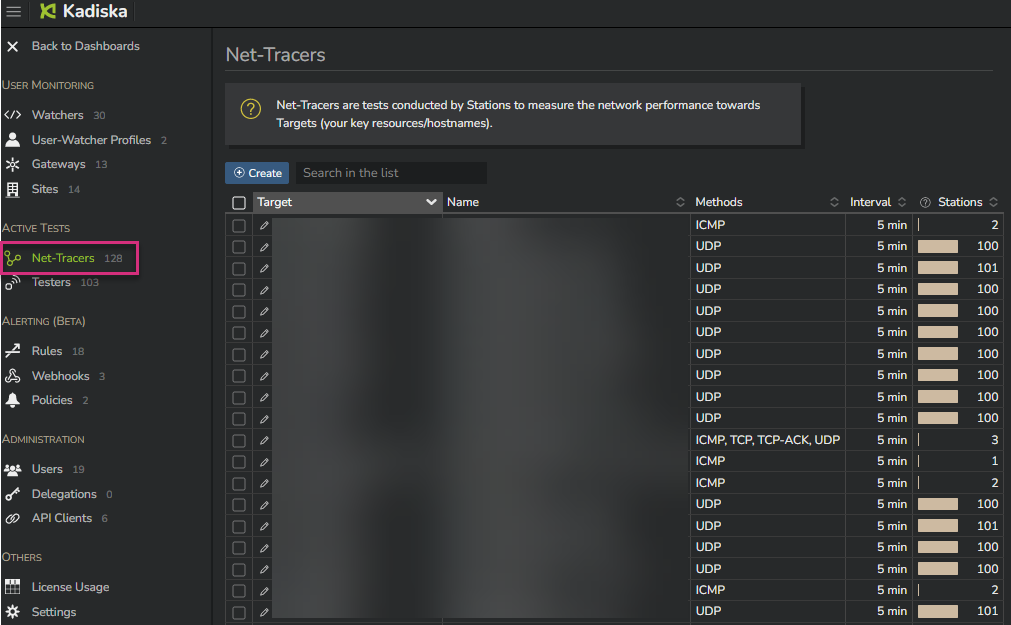
In this Net-Tracers menu, you can see all existing Net-Tracers. Click on "Create" to create a new Net-Tracer:
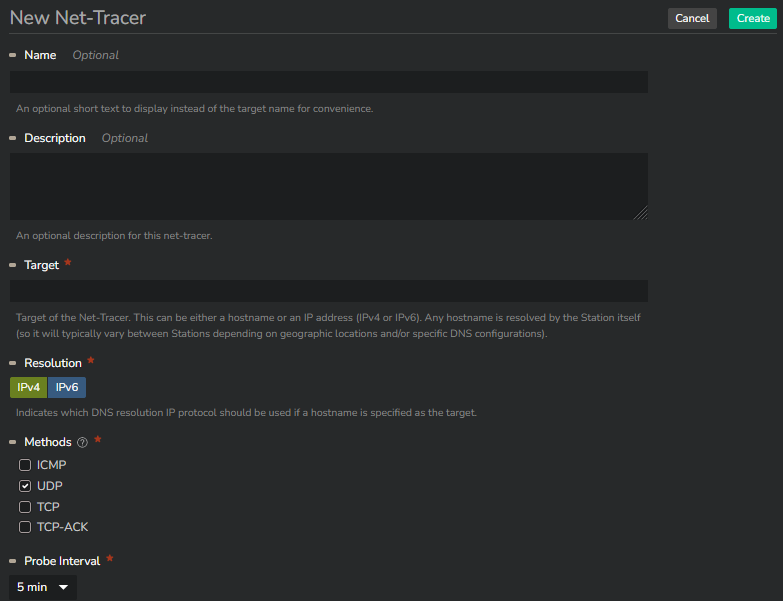
You can configure:
- the name of the target (optional)
- the description of the Net-Tracer (optional)
- the targeted hostname (must be a domain name, an IPv4 or an IPv6 address)
- IPv4 or IPv6 protocol used for the initial DNS resolution process (if the targeted hostname is a URL)
- the interval (in minutes) between consecutive tests (1, 5, 10, 15, 20 or 30 minutes)
- the method used to test the connectivity and network path to the target (please refer to this section for more information)
A Net-Tracer can only contain one target.
When the name of the target is configured, it will be displayed in related dashboards. The targeted hostname or IP address will be displayed otherwise.
Once the configuration is done, click on the "Create" button to finalize the Net-Tracer creation process. The Net-Tracer is now created but is not yet associated to any Tester.
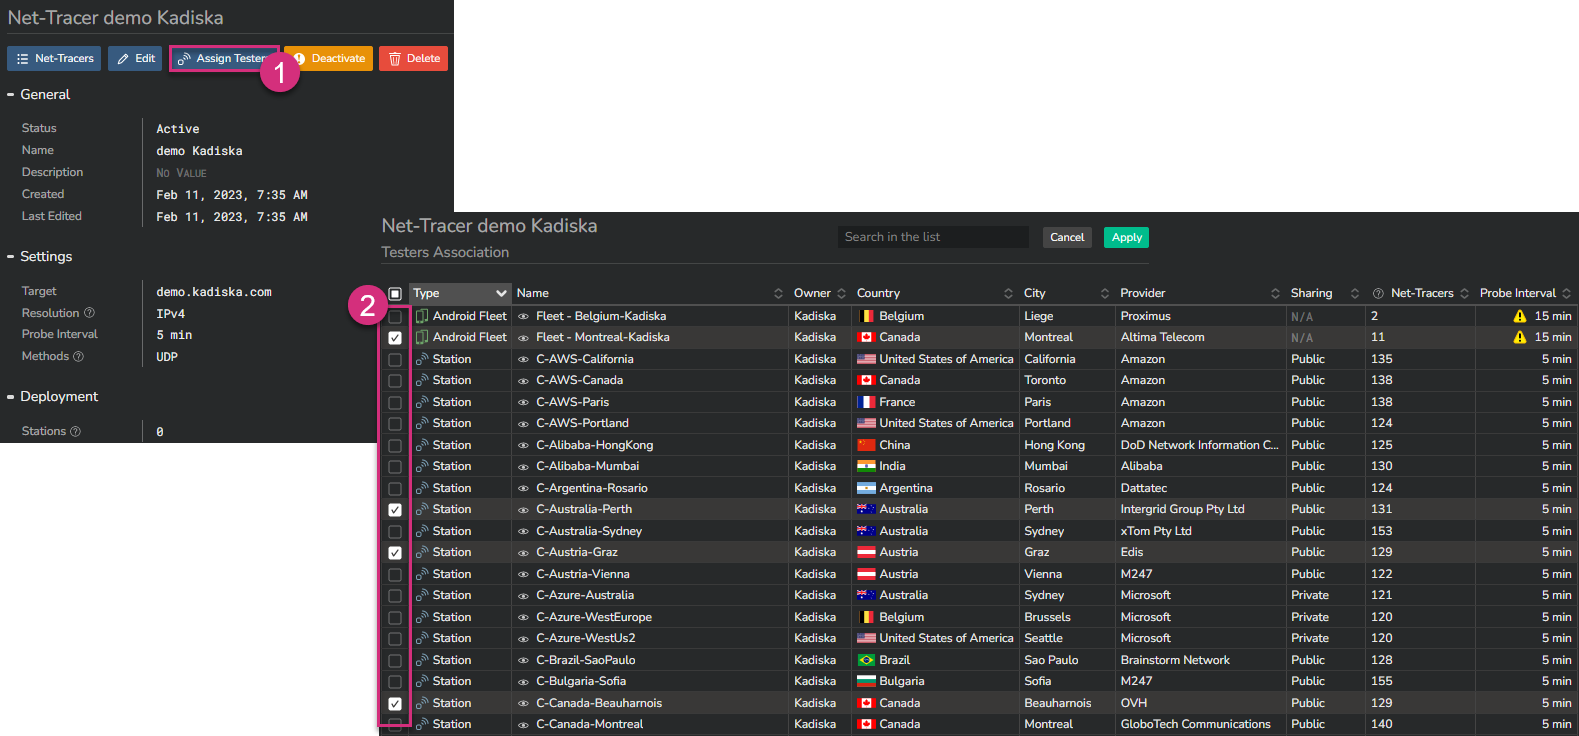
Step 2: Net-Tracer activation
In order to associate the Net-Tracer with one or multiple Testers, click on "Assign Testers" (1). Select the Station(s) and/or the Fleet(s) you want to activate the Net-Tracer on (2). Finally, click on "Apply" to confirm your configuration.
That's it, your Net-Tracer is now active on the selected Tester(s).