Time selector
Logically, one of the first things you will do when you access your Kadiska environment is select the time range for which you want to analyze the data that has been collected.
The initial set of data you view, by default, covers the previous 24 hours.
On the upper left corner of your screen, the time range selection bar is always accessible.
It consists of four primary components.

Time range selection
To enter the setup menu, click on the main time selection button.
There are several options in the configuration menu.
Quick selection
First, you can quickly set a time range from the dropdown list at the left side of the menu:
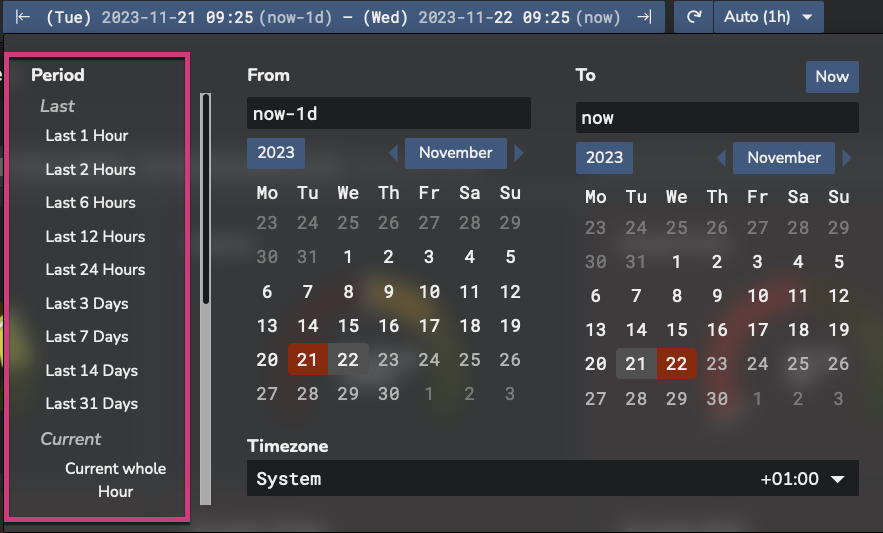
In the "Last" section, you can choose from the previous 1, 2, 6, 12, 24 hours, and the previous 3, 7, 14, and 31 days.
In this case, the time range for selected duration will be between now and past selected duration.
From the "Current" section, you can set the time for the current hour, day, week, or month.
This will pick the time from the beginning of the current hour, day, week, or month till now.
Finally, from the "Past" section, you can choose to view the most recent full hour, day, week, or month.
If you choose the past "Hour" at 9:30 a.m., for instance, the time range will be between 8:00 and 9:00 a.m. For the day, week, and month, the same principle applies.
Manual selection
You have the option to manually select the time range you want to view data for.
You can select the beginning and ending dates of your choice from the calendar view.
In order to better suit their needs, advanced users can additionally manually update the "From" and "To" fields. You may enter "now-3d" as the start time and "now-1h" as the end time, for instance.
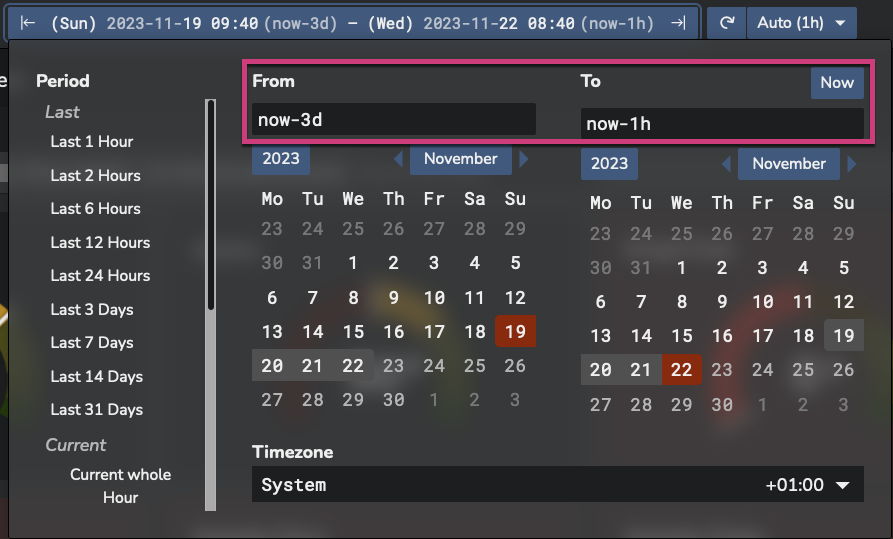
- now-1h corresponds to the last hour
- now/h corresponds to the current hour
- now/h-h corresponds to the whole past hour
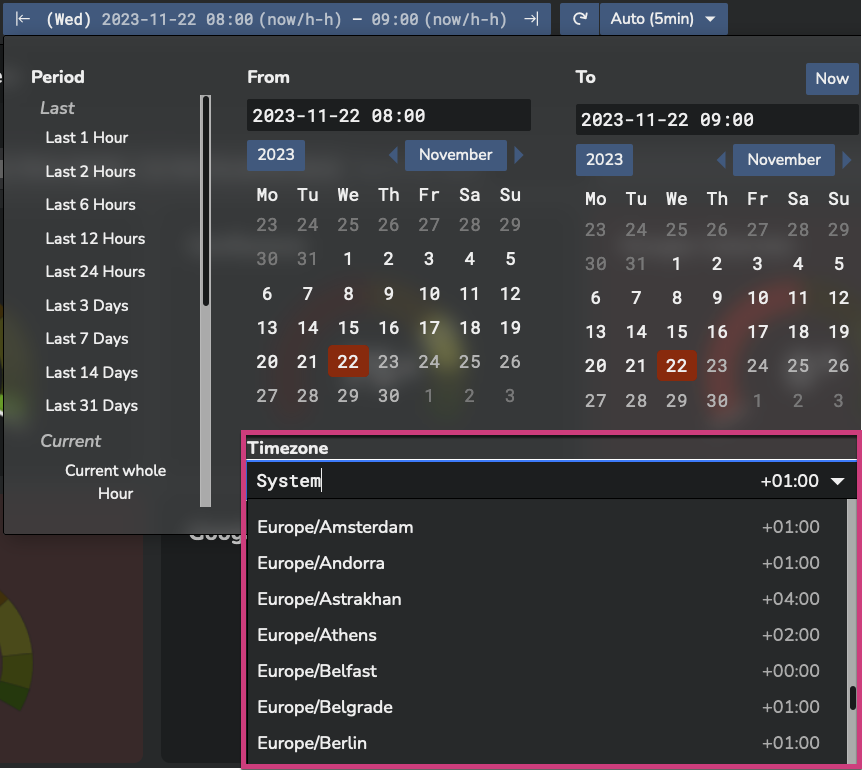
Timezone
You can select the timezone to align with global corporate environments.
By default, the timezone is set to your local machine's system setting.
Moving from a time range to the previous or next
The two buttons at the left side of the time selection bar allow you to quickly navigate from one time range to the previous or next one.

For example, if you initially selected the time range between 8:00am and 10:00am, when clicking on the previous button, you automatically transition to the time range from 6:00am to 8:00am. Clicking on the next button will transition to the next time range (10:00am to 12:00am in this example).
Retrieving last time range selections
The "Recent time ranges used" button allows you to retrieve up to the last 6 time range selections, the most recent one being at the top of the list.

Auto-refresh
Depending on the selected time range, the data will be updated automatically according to the auto-refresh setting.
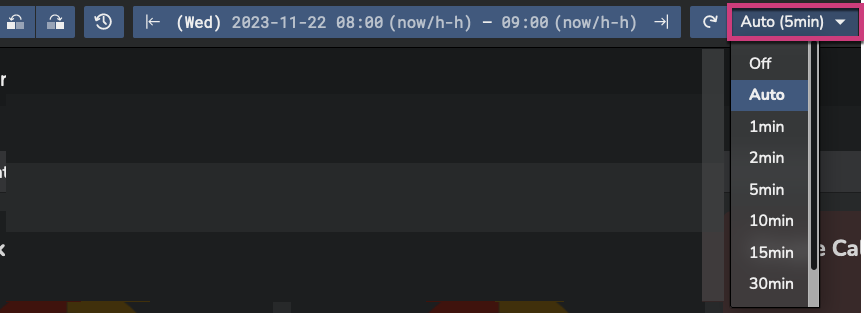
This default value is automatically set.
For example, when selecting the last hour, the auto-refresh will be triggered every minute. However, when selecting the last week, it is set to 1 hour by default.
Each refresh will update the time range (sliding window).
This auto-refresh can be manually configured from 1 minute to 1 hour.
It can also be switched off (select the option "off" from the dropdown list).